If you have a cantilever brake bike and would like to switch to the more popular V brake, this article will show you how in just 11 simple steps. V brakes offer superior stopping power and are easier to adjust and maintain than cantilever brakes. The conversion process is relatively simple and can be done in an afternoon.
Step 1: Remove Old Brake Levers
Assuming you would like an introduction for the entire article:

If you’re looking to upgrade your cantilever brakes to v-brakes, you’ve come to the right place. This guide will walk you through the process step-by-step, so you can get back to enjoying your ride as soon as possible.
Step 2: Remove the Cable Hanger
If you’re looking to upgrade your cantilever brakes to v-brakes, follow these 11 simple steps. This is a quick and easy process that only takes a few minutes. Step 2 is to remove the cable hanger.
Step 3: Mount the V Brakes
Make sure that the pads are properly aligned with the rim before tightening them down. This section will focus on how to mount the V brakes. Once the arms are in place, you can then install the brake pads. Be sure to align the arms so that they are level with each other. You will need to remove the cantilever brake arms and then install the V brake arms in their place.
Step 4: Install Brake Levers on Handlebars
This conversion is relatively simple and can be done in a few hours. Most mountain bikes come with cantilever brakes, but you may want to upgrade to v-brakes for better stopping power. Here are the steps:
1. Remove the old brake levers and cables from the handlebars.
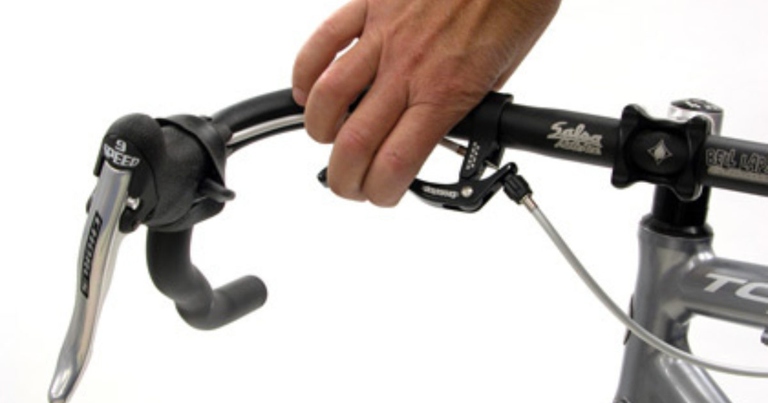
2. Install the new brake levers on the handlebars.
3. Attach the new cables to the brake levers and calipers.
4. Adjust the brakes so that they are properly aligned.
5. Test the brakes to make sure they are working properly.
Step 5: Install Grips
This is a relatively simple process, but there are a few things to keep in mind. Second, when installing the grips, be sure to use plenty of lubricant to prevent the grips from slipping. Once the grips are installed, test them by pulling on the brake levers to make sure they are secure. First, make sure that the grips you select are compatible with your handlebars. Installing grips is the fifth and final step in converting your cantilever brakes to v brakes.
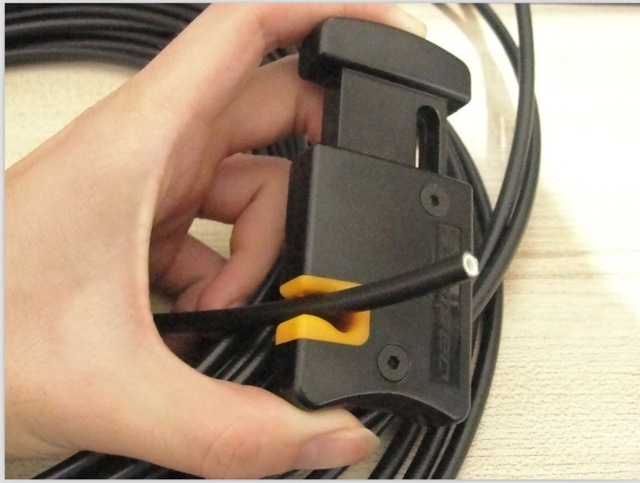
Step 6: Cut Cable Housing
If you’re looking to convert your cantilever brakes to v-brakes, this article will show you how in just 11 simple steps. In step 6, we’ll be cutting the cable housing. You’ll need a sharp knife or a pair of scissors for this step.
First, measure the length of cable housing you’ll need. You’ll want to add about 3 inches to this measurement to account for any adjustments you may need to make later.
Next, use your knife or scissors to carefully cut the cable housing to the desired length. Make sure to leave a bit of extra cable at the end in case you need to make any adjustments.
First, thread the cable through the housing. Finally, screw on the housing cap to secure it in place. Then, insert the housing into the brake lever. Now, it’s time to install the cable housing.
And that’s it! In just a few simple steps, you’ve successfully converted your cantilever brakes to v-brakes.
Step 7: Turn the Barrel Adjuster
Assuming you would like an introduction for a section on Step 7: Turn the Barrel Adjuster of an article titled Cantilever To V Brake Conversion – 11 Simple Steps:

Next, locate the barrel adjuster on the brake caliper. Finally, test the brakes to make sure they are working properly. Be careful not to over-tighten it, as this can damage the brake caliper. Once you have found it, use the screwdriver to turn the barrel adjuster clockwise until it is tight. First, you’ll need a Phillips head screwdriver. If they are, you’re all done! It is usually located near the top of the caliper. This is a relatively easy process that only requires a few tools. One of the final steps in converting your cantilever brakes to V-brakes is to turn the barrel adjuster.
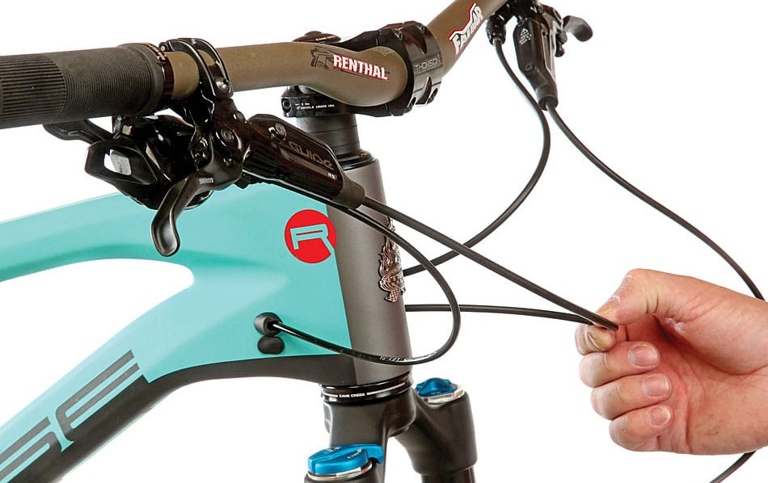
Step 8: Slide the Cable through the Lever
Finally, tighten the brake lever’s clamp bolt. Next, slide the cable housing through the lever and out the other side. If it is too short, you will need to get a new cable. Make sure the housing is long enough to reach from the lever to the caliper. In step 8, you will need to slide the cable through the lever. The cable should be long enough to reach from the brake lever, through the cable housing, and to the brake caliper. Then, slide the cable through the lever and out the other side. To do this, first loosen the brake lever’s clamp bolt. If it is too short, you will need to get new housing. If you have a cantilever brake set-up on your bike and want to convert to V-brakes, follow these 11 simple steps.
Step 9: Mount the Cables
Make sure you have the correct size cables for your brake levers and v-brakes. In step 9, you’ll need to mount the cables. If you’re looking to convert your cantilever brakes to v-brakes, here are 11 simple steps to follow. You’ll also need to determine the correct cable length and cut the cables to size.
Step 10: Check the Tension
This article will outline the 11 simple steps to take in order to make this happen. Step 10 is all about checking the tension. The tension should be firm, but not too tight. Once you have the brake pads in place and the brake arms adjusted, it’s time to check the tension. You don’t want the brake pads to rub on the wheel, but you also don’t want them to be too loose. If you have a cantilever brake bike and want to convert to V brakes, there are a few things you need to do.
Step 11: Trim the Excess
This section will focus on Step 11: Trim the Excess. If you’ve decided to convert your cantilever brakes to v-brakes, there are only a few simple steps you need to follow.
Once you’ve installed your v-brakes and adjusted them to your liking, you may find that there is some excess brake cable. This is easily fixed by trimming the excess with a pair of cable cutters.
Be sure to leave enough cable so that you can still make adjustments if needed, but don’t leave too much or it will just get in the way. With the excess trimmed, your v-brake conversion is now complete!
A Final Check
If you’re converting your cantilever brakes to V brakes, there are a few things you need to do to make sure the job is done right. In this section, we’ll go over some final checks you should do before you ride off into the sunset.
What Advantages Do V-Brakes Have Over Cantilever Brakes?
In addition, v-brakes are lighter weight and more compact than cantilever brakes, making them ideal for use on mountain bikes. V-brakes offer superior stopping power, are easier to adjust and maintain, and provide better clearance for mud and debris. There are many reasons to switch from cantilever to v-brakes.
Easy to Adjust
This means that you only have to adjust one cable when you’re setting up your V-brakes, which is much simpler than adjusting two cables on cantilever brakes. V-brakes are easier to adjust than cantilever brakes. V-brakes have a single cable that runs from the brake lever to the caliper, while cantilever brakes have two cables that run from the brake levers to the calipers.
Cantilever brakes have fixed spring tension, so you can’t adjust them to apply more or less pressure to the rim. V-brakes also have adjustable spring tension, which means you can fine-tune the amount of pressure that the brakes apply to the rim.
This is because the V-brake’s design puts less stress on the brake pads, which prevents them from vibrating and making noise. Finally, V-brakes are less likely to develop “brake squeal” than cantilever brakes.
Comfortable to Use
V-brakes also tend to be more comfortable to use, thanks to their more ergonomic design. Additionally, V-brakes typically offer better mud- and water-clearance than cantilever brakes, making them ideal for off-road riding. V-brakes offer several advantages over cantilever brakes, chief among them being increased stopping power and easier adjustment.
Why do people still prefer Cantilever Brakes?
Cantilever brakes are often used on mountain bikes and cyclocross bikes, as they provide more clearance for mud and debris than other types of brakes. Others find that cantilever brakes provide more stopping power than other types of brakes. Cantilever brakes are a type of bicycle brake that uses two arms, mounted on either side of the wheel, to apply pressure to the braking surface. Some people prefer cantilever brakes because they are easier to adjust and maintain than other types of brakes.
Cantilever vs. V Brake – A Comparison
Cantilever and v-brakes are two of the most popular types of brakes for bicycles. They both have their pros and cons, so it’s important to know which one is right for your bike. Here’s a quick comparison of the two types of brakes:

They’re also more expensive. Cantilever brakes are more powerful than v-brakes, but they can be difficult to adjust.
V-brakes are easier to adjust than cantilever brakes, but they’re not as powerful. They’re also less expensive.
It depends on your budget and your riding style. But if you’re a more serious rider, cantilever brakes may be worth the extra cost. If you’re a casual rider, v-brakes may be all you need. So, which type of brake is right for you?
Why are V brakes and Cantilevers difficult to interchange?
V brakes and cantilevers are designed for different purposes and as a result, they are not easily interchangeable. In addition, V brakes typically have longer arms than cantilevers, which can make them difficult to mount on a cantilever frame. V brakes are designed for use with suspension forks, while cantilevers are designed for use with rigid forks. V brakes also require special adapters in order to be compatible with cantilever bosses, and vice versa.
Frequently Asked Questions
1. What is a cantilever brake?
A cantilever brake is a type of bicycle brake that uses two arms to pivot from the frame of the bicycle. The arms are connected to the brake pads, which press against the rim of the wheel to slow or stop the bicycle.
2. What is a v-brake?
A v-brake is a type of bicycle brake that uses two arms that are connected at the top, forming a “v” shape. The arms are connected to the brake pads, which press against the rim of the wheel to slow or stop the bicycle.
3. Why would I want to convert my cantilever brakes to v-brakes?
There are a few reasons you might want to convert your cantilever brakes to v-brakes. V-brakes offer better stopping power than cantilever brakes, so if you’re looking for better performance, v-brakes are the way to go. V-brakes are also easier to adjust and maintain than cantilever brakes.
4. What do I need to convert my cantilever brakes to v-brakes?
To convert your cantilever brakes to v-brakes, you’ll need a v-brake kit, which includes the arms, pads, and hardware. You’ll also need to remove your old cantilever brake arms and pads.
5. How do I install the v-brake kit?
Installing a v-brake kit is relatively simple. First, remove your old cantilever brake arms and pads. Next, attach the v-brake arms to the frame of your bicycle. Then, attach the v-brake pads to the arms. Finally, adjust the tension on the arms so that the pads press firmly against the rim of the wheel.
6. How do I adjust the v-brakes?
Adjusting v-brakes is easy. First, make sure the pads are pressing firmly against the rim of the wheel. If they’re not, loosen the tension on the arms and adjust the position of the pads. Next, check the alignment of the pads. If they’re not parallel, adjust the alignment screw on the arm until they are. Finally, tighten the tension on the arms so that the pads press firmly against the rim of the wheel.
7. How do I know if my v-brakes are adjusted correctly?
There are a few things you can check to see if your v-brakes are adjusted correctly. First, make sure the pads are pressing firmly against the rim of the wheel. Next, check the alignment of the pads. They should be parallel to each other. Finally, check the tension on the arms. The arms should be tight enough that the pads press firmly against the rim of the wheel, but not so tight that the pads rub against the tire.
8. What are the benefits of v-brakes over cantilever brakes?
There are a few benefits of v-brakes over cantilever brakes. V-brakes offer better stopping power than cantilever brakes, so if you’re looking for better performance, v-brakes are the way to go. V-brakes are also easier to adjust and maintain than cantilever brakes.
9. Are there any drawbacks to converting my cantilever brakes to v-brakes?
The only potential drawback to converting your cantilever brakes to v-brakes is that you may need to purchase a new set of wheels that are compatible with v-brakes. Most modern wheels are compatible with both v-brakes and cantilever brakes, but some older wheels may not be.
10. Will I need to purchase new wheels if I convert my cantilever brakes to v-brakes?
Most modern wheels are compatible with both v-brakes and cantilever brakes, but some older wheels may not be. If you’re not sure if your wheels are compatible with v-brakes, check with the manufacturer or a local bike shop.
Final thoughts
This is a great way to upgrade your old cantilever brakes to the more modern v-brake. This conversion is relatively simple and only requires a few tools. With just a few steps, you can have your bike stopping better than ever.